Nikon D7000
f11 5s ISO100 18mm
15 July 2020 at 23.26
After sunset at Lumparn, The Åland Islands.

Skapa djup i bilden.

När jag tittar tillbaka på mina bilder för denna vecka, och även förra veckan, i mina Photographic Steps så ser jag att jag har jobbat med att försöka få djup och perspektiv i bilderna. Det vanligaste knepet jag har använt mig av har varit förgrund, mellangrund och bakgrund. Men jag har även använd mig av centralperspektiv och storleksförhållanden.

Detta med komposition i fotografier började jag fundera kring redan i slutet av 80-talet med min första kamera i händerna som 15-åring. Kameran var en Olympus OM10 som jag helt enkelt lade beslag på från min pappa.

På biblioteket i Strängnäs fick jag tag i Ulf Sjöstedts bok Fotokomposition som kom ut 1984. En väldigt tydlig och pedagogisk bok som visade vägen till linjer och rörelser i fotografiska bilder. Jag studerade den utan och innan och vissa teorier förstod jag inte alls men försökte i alla fall applicera dem på mina bilder. Det slutade med att jag faktiskt höll en studiecirkel med bidrag från Studiefrämjandet med den boken som studielitteratur. Sedan var det visserligen bara mina närmaste vänner som var deltagare, men i alla fall! Vi avslutade kursen genom att åka till Dalarna och fota svartvita vinterbilder!

Recension på Fotokomposition (Ulf Sjöstedt) - Läs omdömen - Fotosidan
My first book about composition!

Förgrund, mellangrund och bakgrund

Då fanns det nästan bara en bok på svenska i ämnet, men nu finns det hur mycket som helst i ämnet komposition på nätet, så är du intresserad så är det bara att söka.

Men kortfattat vad det handlar om är att man oftast delar in bilden i tre delar nedifrån och upp. Längst ned är förgrunden och den delen är oftast närmast fotografen. Sedan har man mellangrunden som oftast är mittenpartiet på bilden och ligger bakom förgrunden. Den här delen är oftast tom och kan bestå av en ren yta som tex vatten i en sjö eller havet som i min bild här nedan. Längst upp i bilden kommer sedan bakgrunden och det vanligaste som brukar finnas där är himlen eller en mäktig bergskedja.

Create depth in the image.

When I look back at my pictures for this week, and also last week, in my Photographic Steps I see that I have worked on trying to get depth and perspective in the pictures. The most common trick I have used has been foreground, middleground and background. But I have also used central perspectives and size ratios.

This with composition in photographs, I started thinking about already in the late 80’s with my first camera in my hands as a 15-year-old. The camera was an Olympus OM10 that I simply seized from my dad.
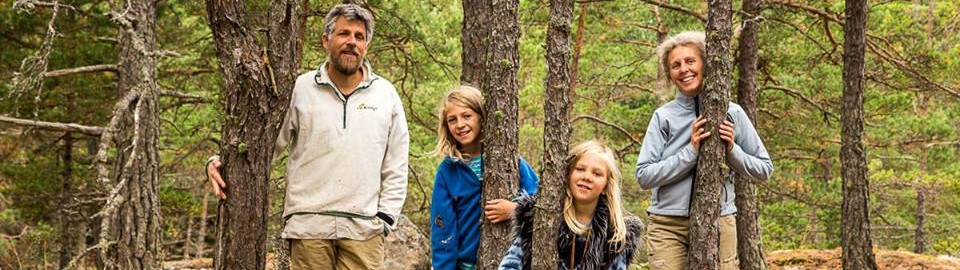
Olympus OM10
My first camera!
Bild av SplitShire från Pixabay

At the library in Strängnäs, I got hold of Ulf Sjöstedt’s book Photocomposition, which was published in 1984. A very clear and pedagogical book that showed the way to lines and movements in photographic images. I studied it inside and out and some theories I did not understand at all but at least tried to apply them to my pictures. It ended with me actually holding a study circle with grants from Studiefrämjandet (an adult education association) with that book as study literature. Then, of course, only my closest friends were participants, but in any case. We finished the course by going to Dalarna and taking black and white winter pictures!

Foreground, middleground and background

Then there was almost only one book in Swedish on the subject, but now, there are tons of how in the subject composition online, so if you are interested, just search.

But briefly what it is about is that you usually divide the image into three parts from the bottom up. At the bottom is the foreground and that part is usually closest to the photographer. Then you have the middle ground, which is usually the middle part of the picture and is behind the foreground. This part is usually empty and can consist of a clean surface such as water in a lake or the sea as in my picture below. At the top of the picture is the background and the most common thing there is usually the sky or a mighty mountain range.

Foreground, middleground and background!
Nikon D7000
f8 1/320s ISO100 80mm
12 July 2020 at 14.48
Lumparn, The Åland Islands

För att få harmoni i detta så använder man sig oftast av tredjedelsregeln, vilken säger att varje del ska bestå av en tredjedel av bildens yta.

Men alla fotografiska regler är till för att brytas så använd detta som en grund och experimentera sedan tills det känns rätt för dig och bilden uttrycker det som du vill förmedla.

Hittar jag inte rätt på en gång i en bild, så brukar jag ta hjälp av de hjälplinjer som finns i bildredigeringsprogrammet Raw Therapee, som jag använder, under modulen Beskär. Mer om Raw Therapee kan du hitta i min blogg Go for RAW.

To get harmony in this, you usually use the rule of thirds, which says that each part must consist of one third of the surface of the image.

But all photographic rules are there to be broken, so use this as a basis and then experiment until it feels right for you and the image expresses what you want to convey.

If I do not find the right cropping in an image at once, I usually use the help lines in the photo editing program Raw Therapee, which I use, under the module Crop. You can find more about Raw Therapee in my blog Go for RAW.

Södragatan, Mariehamn, The Åland Islands
Nikon D7000
f5,6 1/25s ISO1600 130mm
6 July 2020 at

Perspektiv och storleksförhållanden

I bilden på Södragatan i Mariehamn har jag använt mig av centralperspektiv eller också kallat enpunktsperspektiv. Alltså att alla linjer samlas i en punkt långt bort i bild.

En vanligt uppgift på bildlektionen brukar det vara att rita en sådan bild där man börjar med att rita upp en punkt på pappret (oftast i mitten) och sedan dra stödlinjer från kanten av pappret till punkten. Perspektivet förstärks genom att saker som är nära tecknas större än saker som är längre bort och då gärna samma sak som tex lyktstolpar, staketstolpar eller fönster utmed en husvägg eller som här: träd, bilar och vägmarkeringar.

Jag fick även ta flera bilder för att vara säker på att någon blev någorlunda skarp. För som ni ser så var jag nere på 1/25 sekund och med zoomen på 130 mm så fanns det alla möjligheter till skakningsoskärpa, genom att jag inte hade något stativ!

Om skakningsoskärpa kan du läsa i mina tidigare blogginlägg 5 more photo tips for real beginners och Working with 5 more photo tips for real beginners.

Perspective and size ratios

In the picture of Södragatan (Southstreet) in Mariehamn, I have used a central perspective or also called a one-point perspective. That is, all lines gather at a point far away in the image.

A common task in the picture lesson is usually to draw such a picture where you start by drawing a point on the paper (usually in the middle) and then draw guidelines from the edge of the paper to the point. The perspective is strengthened by drawing things that are close larger than things that are further away and then preferably the same thing as, for example, lampposts, fence posts or windows along a house wall or as here: trees, cars and road markings.

I also had to take several pictures to be sure that someone was reasonably sharp. As you can see, I was down in 1/25 second and with the zoom of 130 mm, there were all possibilities for shaking blur, because I did not have a tripod!

You can read about shake blur in my previous blog posts 5 more photo tips for real beginners and Working with 5 more photo tips for real beginners.

Nikon D7000
f5 1/100s ISO400 18mm
15 July 2020 at 22.22
Lumparland, The Åland Islands

Bilden ovan från Lumparland har jag också försökt skapa djup i genom att dela upp bilden i förgrund, mellangrund och bakgrund och förstärkt mellangrunden genom att göra den ljusare, med hjälp av en mörkare vinjett. Vinjett är ett bra sätt att få tittaren att se det du vill att de ska titta på och dämpa saker som kan störa ute i kanterna.

The image above from Lumparland I have also tried to create depth in by dividing the image into foreground, middleground and background and reinforced the middleground by making it lighter, using a darker vignette. Vignette is a good way to get the viewer to see what you want them to look at and dampen things that can interfere in the edges.

Nikon D7000
f4 1/60s ISO400 18mm
15 July 2020 at 21.54
Lumparland, The Åland Islands

Här är en variant på enpunktsperspektiv där punkten ligger uppe till höger i bilden och staketets stolpar visar djupet genom att upplevas mindre och mindre. Finns också en tydlig förgrund och mellangrunden blir staketet och vattnet och sist blir skogen och avslutet på staketet bakgrunden.

Here is a variant of a single-point perspective where the point is at the top right of the picture and the fence posts show the depth by being experienced smaller and smaller. There is also a clear foreground and the middle ground will be the middle of the fence and the water and finally the forest and the end of the fence will be the background.

Lämna gärna en kommentar om vad du tycker eller hur du arbetar med djup i bilden!

Feel free to leave a comment about what you think or how you work with depth in the picture!

Here are some more pictures that I took this week.

Jag lämnar stöket vid vindskyddet och letar mig upp för den visserligen markerade, men ej spårade, leden mot Synddalskläppen i Sälenfjällen. Alldeles för många människor vid Kläppenskjulet, som vindskyddet heter, för min smak.

Letar mig uppåt bland tallarna och kikar efter ledkryssen som leker tittut bakom träden. Efter några hundra meter norrut i ensamheten och med 30 meters stigning är jag klart andfådd. Stigning och dålig valla är ingen bra kombination. Hade helt klart för mig att min vallaburk låg i min jackficka men det visade sig att den inte gick att hitta, så jag fick klara mig på förra turens valla-rester under skidorna.

Men när mina flåsningar är som värst kommer jag fram till en lite sjö. Sjön har inget namn på min karta men den skulle kunna heta Syndtjärn med tanke på vad annat heter i närheten.

Solen lyser mellan de låga tallarna och värmer nästan så här i mitten av februari. Får av mig skidorna och sätter på mig min varma, goa jacka utanpå min skaljacka och slår mig ner i solen lutad mot en tall. Det gnistrar i snön, men inte av kyla för det är bara några minusgrader, utan av solens lek med snökristallerna. Vindstilla. Skönt. Fika.

Är ingen termosmänniska genom att jag inte är någon kaffemänniska, så därför blir det äpple- och fläder-jos med rullmackor. Njuter en stund av solen och smakerna men sedan vill jag vidare. Jag ska ju till toppen av Synddalskläppen! Framåt, framåt! Uppåt, uppåt!

I leave the mess at the shelter and look for the admittedly marked, but not tracked, trail towards Synddalskläppen in Sälenfjällen. Far too many people at Kläppenskjulet, as the shelter is called, for my taste.

Searching my way upwards among the pines and looking for the trail marking that play peekaboo behind the trees. After a few hundred meters north in solitude and with a 30 meter climb, I am clearly out of breath. Rise and bad waxing are not a good combination. It was quite clear to me that my ski wax was in my jacket pocket, but it turned out that it could not be found, so I had to make do with the previous trip’s ski wax leftovers under the skis.

But when my panting is at its worst, I come to a little lake. The lake has no name on my map but it could be called Syndtjärn considering what else is called nearby.

The sun shines between the low pines and warms almost me in mid-February. Get off my skis and put on my warm, good jacket on top of my shell jacket and sit down in the sun leaning against a pine tree. It sparkles in the snow, but not from the cold because it is only a few degrees below zero, but from the sun’s play with the snow crystals. Windless. Nice. Rest.

Am not a thermos person because I am not a coffee person, therefore it will be apple and elder juice with roll sandwiches. Enjoying the sun and the flavours for a while but then I want to move on. I’m going to the top of Synddalskläppen! Forward, forward! Upwards, upwards!


FACTS
Samsung SM-G955F
f1,7 1/2656s ISO40 4,20mm
19 Feb 2020 at 14.05
On the way up to Synddalskläppen, Sälen, Sweden


Me with my new tripod!
Herröskatan, The Åland Islands
Photo Therese Lomner

Att utöka sitt fotograferande till att kunna jobba med längre slutartider är ett stort steg och för att kunna ta det steget behövs någon form av stöd för kameran. Stöd finns att köpa i form av stativ i olika former som trebenta och enbenta, korta och långa och sådana man kan vira fast runt en gren. Problemet med de flesta som är något att ha, alltså stadiga och stabila, är att de kostar en hel del pengar.

Jag har nu kommit så långt i mina Photographic Steps att jag gärna vill ha ett stativ. Främst för att kunna ta bilder med rörelser och då vatten som rör sig. Genom att vi har väldigt få forsar och vattenfall på Åland men väldigt mycket hav så är det just detta jag vill fota. Vågor i rörelse. Hur coolt som helst!

Nu till problemet. Jag har inte råd att köpa något vettigt stativ just nu så min lösning blir att bygga ett eget för så lite pengar som möjligt! Så här följer en beskrivning av min lösning på problemet.

Extending your photography to be able to work with longer shutter speeds is a big step and to be able to take that step, some form of support for the camera is needed. Supports are available in the form of stands in various shapes such as three-legged and single-legged, short and long and such that you can wrap around a branch. The problem with most supports that are something to have, ie steady and stable, is that they cost a lot of money.

I have now come so far in my Photographic Steps that I would like a tripod. Mainly to be able to take pictures with movements and most of all moving water. Because we have very few rapids and waterfalls on Åland, but a lot of sea, this is exactly what I want to photograph. Waves in motion. How cool is that!

Now to the problem. I can not afford to buy a sensible stand right now so my solution will be to build my own for as little money as possible! Here is a description of my solution to the problem.

One of the first pictures taken with help of the tripod.
Nikon D7000
f22 2s ISO100 56mm
7 July 2020 at 22.43
Herröskatan, The Åland Islands

Vad du behöver för att bygga ditt eget stativ:

Ben
– 3 st 45×45 mm regel, i en längd som passar dina behov
– 3 st bult M6, 80 mm långa med helst vingmutter
– 6 st 100×45 mm kryssfaner, 12 mm tjock
– 18 st skruv, 30 mm långa

Platta
– 1 st 210×240 mm kryssfaner, 12 mm tjock
– 1 st 90×90 mm kryssfaner 4 mm tjock
– 2 st skruv 15 mm långa med platt huvud

The two plates.

Börja med plattan
1. Såga ut de båda kryssfanerplattorna
2. Borra ett hål i 12 mm plattan som är lika stor som huvudet på din skruv till fästet på kameran.

My screw for the neck sling that I use to mount the camera on the tripod.


3. Karva ut med tex en kniv undersidan av hålet så att du kommer åt med fingrarna runt huvudet för att kunna skruva in skruven.
4. Borra ett hål i 4 mm plattan som är lika stor som gängan på skruven.
5. Limma och skruva fast 4 mm plattan på 12 mm plattan med de två 15 mm skruvarna och använd din skruv för att passa in hålen till varandra.

Bygg sedan fästena till benen av två 100×45 mm kryssfaner och en avsågad del av benen ca 40 mm långa.
1. Förborra hålen med en borr med mindre dimension än 30 mm skruvarna. Även i benbiten så att den inte spricker när du skruva i skruvarna.

Legs with brackets.


2. Skruva fast plattorna på sidorna av de avsågade benbitarna. Använd 2 st 30 mm skruvar till varje platta.
3. Sätt dit benen i fästet och lämna ett avstånd på 20 mm mellan benen och den avsågade benbiten.
4. Borra ett 6 mm hål genom benfästet och benet.
5. Ta bort benen ur fästet och skruva dit fästena på undersidan av 12 mm plattan med 2 st 30 mm skruv. Genom att det är 3 ben och fyra hörn på plattan så får du hitta ett bra mönster för var du vill att benen ska sitta!
6. Sätt tillbaka benen i benfästet och tryck i M6 bulten och skruva fast med vingmutter.
7. Klart!

Du har nu ett eget stativ för en ringa summa pengar!

Jag misstänker att det går att sätta ett stativhuvud på plattan men jag har inte pengar till det heller just nu så jag har inte testat. Så just nu kan jag bara ta landskapsformat och inte vinkla kameran. Detta gör det lite besvärligt att komma i rätt läge. Vissa motiv går helt enkelt inte att ta medan andra går att komma åt med lite bökande med benen!

What you need to build your own tripod:

Legs
– 3 pcs 45×45 mm rule in a length that suits your needs
– 3 bolts M6, 80 mm long with preferably wing nut
– 6 pcs 100×45 mm plywood 12 mm thick
– 18 screws 30 mm long

Plate
– 1 piece 210×240 mm plywood, 12 mm thick
– 1 piece 90×90 mm plywood 4 mm thick
– 2 screws 15 mm long with flat head

Start with the plate
1. Saw out the two plywood panels
2. Drill a hole in the 12 mm plate that is the size of the head of your screw to the bracket on the camera.
3. Carve out with, for example, a knife the underside of the hole so that you can access it with your fingers around the head to be able to screw in the screw.

From under!


4. Drill a hole in the 4 mm plate that is the same size as the thread on the screw.
5. Glue and screw the 4 mm plate onto the 12 mm plate with the two 15 mm screws and use your screw to fit the holes to each other.

Build the brackets for the legs of two 100×45 mm plywood and a sawn-off part of the legs about 40 mm long.
1. Pre-drill the holes with a drill with a dimension smaller than the 30 mm the screws. Also in the leg piece so that it does not crack when you screw in the screws.
2. Screw the plates to the sides of the sawn leg pieces. Use 2 30 mm screws for each plate.
3. Place the legs in the bracket and leave a distance of 20 mm between the legs and the sawn-off bone piece.
4. Drill a 6 mm hole through the leg bracket and the leg.
5. Remove the legs from the bracket and screw the brackets on the underside of the 12 mm plate with 2 of the 30 mm screws. Because there are 3 legs and four corners on the plate, you get to find a good pattern for where you want the legs to sit!
6. Put the legs back in the leg bracket and push in the M6 ​​bolt and screw in with the wing nut.
7. Clear!

With the camera mounted.


You now have your own stand for a small amount of money!

I suspect that it is possible to put a tripod head on the plate but I do not have money for it either right now, so I have not tested. So right now I can only take landscape format and not angle the camera. This makes it a little difficult to get in the right position. Some motifs simply can not be taken while others can be accessed with a little squeaking with the legs!

Yes. It is a little tricky to get the right position!
Photo Therese Lomner

Here are some more photos taken with help of the tripod.

Den här bilden väcker en hel del frågor i mig trots att jag vet allt om den för det är ju jag som tagit den.

Trots att jag minns väldigt klart omständigheterna innan och efter så får den mig att fundera och det är väl det som får mig att gilla bilden, trots att den är oskarp? Tyvärr oskarp på ett något störande sätt och inte ett konstnärligt sätt som hade framhävt något av bildens budskap.

Men åter till bilden. Om det nu inte hade varit min son på väg upp i Gondolen i Branäs? Vem hade då grabben på bilden varit då? Varför är han där och var är han egentligen? Vad har hänt innan? Var är han på väg och varför ser han så tagen ut eller är det bara en slump, framkommen av kamerans avstyckade fragment av verkligheten, som fångats?

Han ser trött ut efter något som har påverkat honom som han nu måste ta och fundera över eller som får hans tankar att fångas upp, kanske mot hans vilja, för han vill egentligen tänka något annat. Något kul som ligger framför honom, men så dök detta andra upp och tog tag i honom och tvingade honom att stanna upp?

Genom att jag vet hur det var så tror jag att det är en hel del tankar som surrar där inne, för det är första dagarna på vårt stora skidäventyr, där vi mer eller mindre har flyttat hemifrån för att åka skidor i 5 månader och skidor som han faktiskt aldrig har åkt i en backe större en Järmundö på Åland och det bara en enda gång!

När var du ute på ett stort äventyr sist?

This picture raises a lot of questions in me even though I know everything about it because I took it.

Even though I remember the circumstances very clearly before and after, it makes me think and that is what makes me like the picture, even though it is blurry? Unfortunately, blurred in a somewhat disturbing way and not an artistic way that had highlighted any of the image’s message.

But back to the picture. If it had not been my son on his way up the Gondola in Branäs? Who would the boy in the picture have been then? Why is he there and where is he really? What has happened before? Where is he going and why does he look so affected or is it just a coincidence, emerged from the camera’s detached fragment of reality, that was captured?

He looks tired for something that has affected him that he now has to think about or that makes his thoughts catch up, maybe against his will, because he really wants to think something else. Something fun lying in front of him, but then this other one showed up and grabbed him and forced him to stop for a while?

Because I know what it was like, I think there are a lot of thoughts buzzing in there, because it is the first days of our big skiing adventure, where we have more or less moved away from home to ski for 5 months and ski that he actually never ridden on a hill bigger than Järmundö on Åland and then only once!

When was the last time you went on a big adventure?


FACTS
Samsung SM-G900F
f2,2 1/17s ISO800 4,8mm
16 December 2018 at 14.56
The Gondol at Branäs skicenter, Sweden


A new place! Degersand, The Åland islands.
Nikon D7000
f8 1/250s ISO200 40mm
6 July 2020, at 19.22

Välkommen till ännu en blogg där jag delar mina erfarenheter till dig som jag skaffar mig under mitt eget arbete med Photographic Steps.

Denne vecka har jag fortsatt att arbeta med mina tips från mitt tidigare blogginlägg Working with 5 more photo tips. Så här kommer mina reflektioner kring det hela och hur jag själv använder tipsen i mitt fotograferande!

Nummer 1 – Nya platser
Sedan jag började fota mer aktivt så har jag verkligen varit runt på väldigt många fler platser på bara några veckor, än vad jag under flera år varit på tidigare. Väldigt kul att uppleva mitt närområde på nya sätt.

När jag bodde i Sverige och jobbade i Järna under våren var jag runt och tittade på nya platser flera gånger i veckan. Nu när jag åter är på Åland, så har jag återvänt till flera platser som jag tidigare bara besökt några gånger och nu även under andra tider på dygnet.

Jag stannar upp mer nu och betraktar kända ställen på nytt och denna gång med fotoögon. Detta har resulterat i fler bilder på nya och gamla saker och fler har blivit riktigt bra!

Welcome to another blog where I share my experiences with you that I get during my own work with Photographic Steps.

This week I have continued to work with my tips from my previous blog post Working with 5 more photo tips. So here are my reflections on the whole thing and how I use the tips in my photography!

Number 1 – New places
Since I started taking photos more actively, I have really been around in many more places in just a few weeks, than I have been for several years before. Very fun to experience my local area in new ways.

When I lived in Sweden and worked in Järna during the spring, I was around and looked at new places several times a week. Now that I am back on Åland, I have returned to several places that I previously only visited a few times and now also at other times of the day.

I stop more now and look at well known places again and this time with photo eyes. This has resulted in more pictures of new and old things and a lot of them have become really good!

Lervik, The Åland Islands
Nikon D7000
f5,6 1/1000 ISO500 200mm
5 July 2020 at 12.48

Nummer 2 – Skakningsoskärpa
Detta med att hålla reda på vad jag har för lins blir viktigt för mig som kör med ett zoomobjektiv. Jag har blivit bättre på att hålla kameran stadigt med tre stödpunkter och hålla reda på vad slutartiden står på. Detta i kombination med att jag försöker hålla reda på hur mycket jag zoomar in.

Så länge jag håller mig mellan 18 mm och upp till 50 mm så är det lätt att hålla kameran still. Men när jag börjar hamna över 100 mm och till mitt max 200 mm så är det klart svårare. Dels måste jag hålla kameran still men även se till så att jag har tider som överstiger 1/200 dels sekund och gärna hamna på 400 till 500 dels sekund. Har jag tider på över 1/1000 dels sekund så behöver jag inte fundera så mycket igen, utan kan följa objekt som rör sig eller slarva lite med min egen stabilitet.

Number 2 – Shaking blur
This with keeping track of what lens I have, becomes important for me who uses a zoom lens. I have become better at holding the camera steady with the support of three support points and keeping track of what the shutter speed is at. This in combination with trying to keep track of how much I zoom in.

As long as I stay between 18 mm and up to 50 mm, it is easy to keep the camera still. But when I start to end up over 100 mm and to my maximum 200 mm, it is clearly more difficult. On the one hand, I have to keep the camera still, but also make sure that I have times that exceed 1/200 of a second and preferably end up at 400 to 500 in a second. If I have times of over 1/1000 of a second, I do not have to think so much again, but can follow objects that move or be a little careless with my own stability.

Sunnan II, Sjökvarteren, Mariehamn, The Åland Islands
Nikon D7000
f4,8 1/80s ISO400 52mm
16 June 220 at 23.02

Nummer 3 – Skärpa
Har jobbat mycket med att förstå mig på den information som finns i sökaren och då främst var kameran bestämmer fokus.

Det finns många alternativ och jag jobbar fortfarande med att förstå skillnaden mellan AF-A, AF-S och AF-C! Men även varför jag ibland ska välja 39-punkters dynamiskt AF-område och ibland Enpunkt-AF. Jag har än så länge hållit mig till Enpunkts-AF men det är för att jag inte har plåtat så mycket snabba saker. Ska testa nästa gång hunden ska fotas, så får vi se om autofokusen hinner med bättre!

Mitt tips är att du med jämna mellanrum återgår till att läsa manualen för din kamera för att bättre förstå hur du kan använda alla funktioner som den har.

Number 3 – Sharpness
I have worked a lot to understand the information that is in the viewfinder and then mainly where the camera determines the focus.

There are many options and I am still working on understanding the difference between AF-A, AF-S and AF-C! But also why I sometimes have to choose 39-point dynamic AF range and sometimes One-point AF. I have so far stuck to One-Point AF but it is because I have not shot so many fast things. Will test next time the dog is to be photographed, if the autofocus is fast enough!

My tip is that you regularly return to reading the manual for your camera, to better understand how you can use all the features it has.

Lumparn, The Åland Islands
Nikon D7000
f11 1/125s ISO125 200mm
14 June 2020 at 23.19


Nummer 4 – Fota mer!
Här har jag tagit flera steg för att bredda mig och testat att fota nya saker. Porträtt är väl det jag har jobbat mest med men hundar, getter, fåglar, fartyg och blommor är nya saker som har fastnat på bild. Särskilt blommar trodde jag inte att jag skulle vilja fota!

Utmaningarna i Gurushots hjälpte mig mycket i början för att komma utanför ramarna och komma på nya saker att fotografera. Nu känns det mer som om jag själv kommer på nya saker att fotografera och nya idéer dyker med lagom mellanrum upp. Men jag kommer säkert att återgå till Gurushots för att hämta inspiration i framtiden när fantasin tryter.

Number 4 – Take more photos!
Here I have taken several steps to broaden myself and tried to photograph new things. Portraits are probably what I have worked with the most but dogs, goats, birds, ships and flowers are new things that I have capture in a photo. Especially flowers I did not think I would want to take pictures of!

The challenges in Gurushots helped me a lot in the beginning to get outside the box and come up with new things to photograph. Now it feels more as if I myself come up with new things to photograph and new ideas appear at appropriate intervals. But I will certainly return to Gurushots to get inspiration in the future when the imagination runs out.

Kayak paddler, Lervik, The Åland Islands
Nikon D7000
f6,3 1/640s ISO200 200mm
2 July 2020 at 10.04

Nummer 5 – Mer vinklar
Första bilden brukar bli den bästa för mig men jag tar mig nu tid att flytta på kameran, och även mig själv, för att ta fler bilder ur andra vinklar och avstånd. Testar även att använda olika brännvidd för att se vad som händer med perspektivet och då kan det hända, att någon av de andra bilderna blir bättre än den första jag tog.

Processen ger mig i alla fall möjlighet att se på de olika perspektiven på samma motiv och funderar på vad jag gillar och vad i bilden som gör att en bild fungerar för mig.

Number – 5 More angles
The first picture is usually the best for me but I now take the time to move the camera, and also myself, to take more pictures from other angles and distances. Also trying to use different focal lengths to see what happens to the perspective and then it may happen, that one of the other pictures is better than the first one I took.

In any case, the process gives me the opportunity to look at the different perspectives on the same motif and think about what I like and what in the picture makes a picture work for me.

f5,5
1/125s
ISO280
18mm
Lumparn, The Åland Islands
Nikon D7000
f11 1/125s ISO180 26mm
14 June 2020 at 23.15

f10
1/60s
ISO200
18mm

Nu känns det som om jag bara irrar omkring och trött börjar jag bli. Marken övergår från mjuk mossa genomstucken med blåbärsris till hårt berg, beklätt med renlav och klungor av stenrösen. Marken under mig blir magrare och träden runt mig tunnare och vresigare. Skogen ändrar karaktär och det blir krångligare att gå och jag som redan var trött.

Berghällen är det lätt att gå på men områdena med sten blir fler och större och jag vinglar fram över de lösa stenarna med lav, lurande under mina fötter. Väntar på att jag ska lägga trycket lite fel under foten och då ta chansen att lossna, så min fot kan glida iväg åt ett håll som jag inte vill. Detta irrande bara för att hitta en bild. Men de säger ju att det är bra att röra på sig, så jag får väl ut något oavsett om jag hittar en bild eller inte.

Tittar åt höger i mitt balanserande över stenar och ser en öppning bland stenrösen som ser inbjudande ut. Platt utan sten och rötter och med lite mer lav och till och med lite mossa. Drar mig till höger och sjunker ner på marken. En doft av vår kommer upp mot mig. En lukt svår att beskriva men omistlig när den kommer över en. Inser att det är en perfekt bedd jag har framför mig och jag som var trött. Vilket sammanträffande!

Lägger mig på rygg och kan faktiskt sjunka ner lite utan att några kottar eller små grenar trycker sig in i min rygg. Tänker precis blunda när jag ser en bild ovanför mig. Aha! Den har jag sett andra ta så den ska jag ta. Ska bara vila lite först.

När vilade du under träden senast?

Now it feels like I’m just wandering around and I am getting tired. The ground changes from soft moss dotted with blueberry rice to hard rock, covered with reindeer moss and clusters of cairns. The ground beneath me is getting thinner and the surrounding trees are thinner and grumpier. The forest changes character and it becomes more difficult to walk and I who was already tired.

The rock is easy to walk on, but the areas with stones are becoming more and larger and I sway over the loose stones with lichen, lurking under my feet. Waiting for me to put the pressure a little wrong under the foot and then take the chance to loosen, so my foot can slide away in a direction I do not want. This wandering just to find a picture. But they say that it’s good to move, so I’ll get something out of this regardless of whether I find a picture or not.

Looking to the right in my balancing over rocks and seeing an opening among the cairns that looks inviting. Flat without stone and roots and with a little more lichen and even a little moss. Pulls me to the right and sinks to the ground. A scent of spring comes up to me, A smell difficult to describe but indispensable when it comes over you. Realize that it is a perfect bed I have in front of me and I who was tired. What a coincidence!

I lay on my back and can actually sink down a bit without any cones or small branches pushing into my back. Just thinking of closing my eyes when I see a picture above me. Aha! I have seen others take it, so I will take it. Just going to rest a little first.

When was the last time you rested under the trees?


FACTS
Samsung SM-G955F
f1,7 1/120s ISO120
25 April 2020, kl 19.47
Bankesta forest, Järna, Sweden